How to Build a Wildlife Photography Portfolio: A Complete Guide for Nature Photographers
Creating a wildlife photography portfolio is one of the most effective ways to showcase your skills, tell compelling stories about nature, and grow your reputation as a wildlife photographer. Whether you’re a beginner or an experienced nature photographer, a well-curated portfolio helps you reflect on your progress, attract clients, and share your passion for wildlife.
In this guide, you’ll learn how to build a wildlife photography portfolio step-by-step, from selecting your best nature photos to organizing, editing, and presenting them professionally.
Background
I often discuss with repeat workshop clients the benefit of putting together a portfolio of their best work. Putting together a portfolio is one of the quickest ways to speed up your development as a new photographer. When you put all of your best images in one place it really makes you analyse your work. It makes you evaluate your images in a different way.
Back in 2020 I spent some time sorting through all of my old hard drives for a talk that I was asked to do. I was pulling all my best images together and updating my portfolio. It was then that when I reviewed my images I realised that I had a lot of good images, but only a few that I would rate as very good.
There was nothing wrong with the images they were sharp, well exposed and captured the subject, but, most were full body portraits, most were shot with the same type of light and most were good documentary type images.
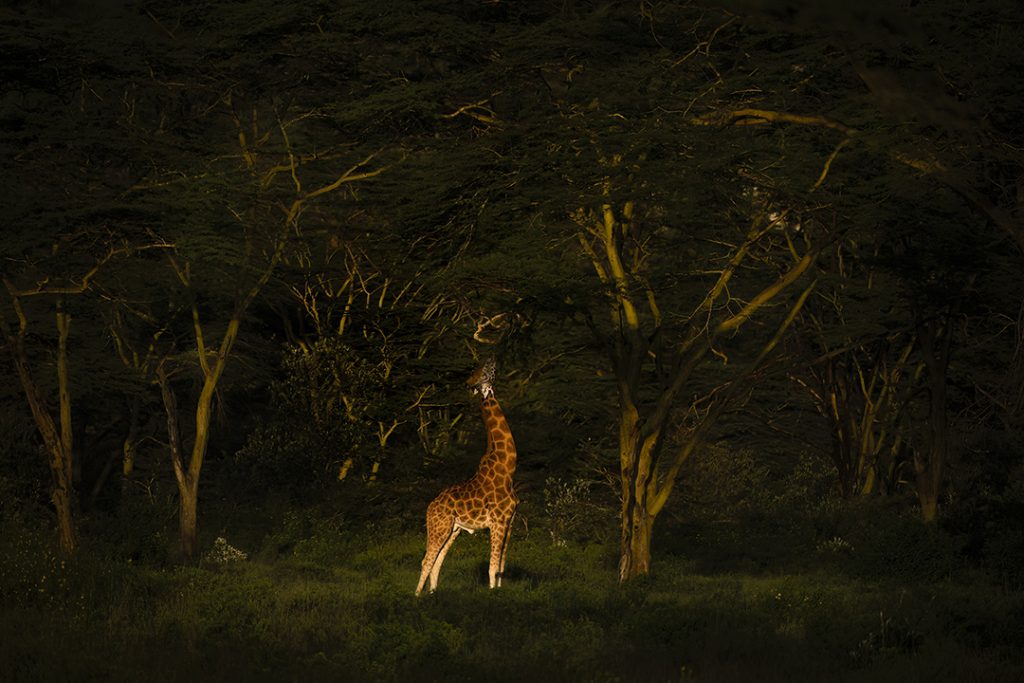
I then reviewed the images that really stood out – I had used side lighting and backlighting, I had shown more of the environment and had experimented with different creative techniques.
By doing this exercise I made it my goal to:
- Use light more effectively ALL the time
- Shoot wider and show more of the environment
- Take the safe shots and then experiment with different techniques – slow shutter speeds etc.
Then every time I went out to do any photography I always had these 3 goals in mind. By doing this simple exercise It completely changed my photographic mindset and transformed my portfolio.
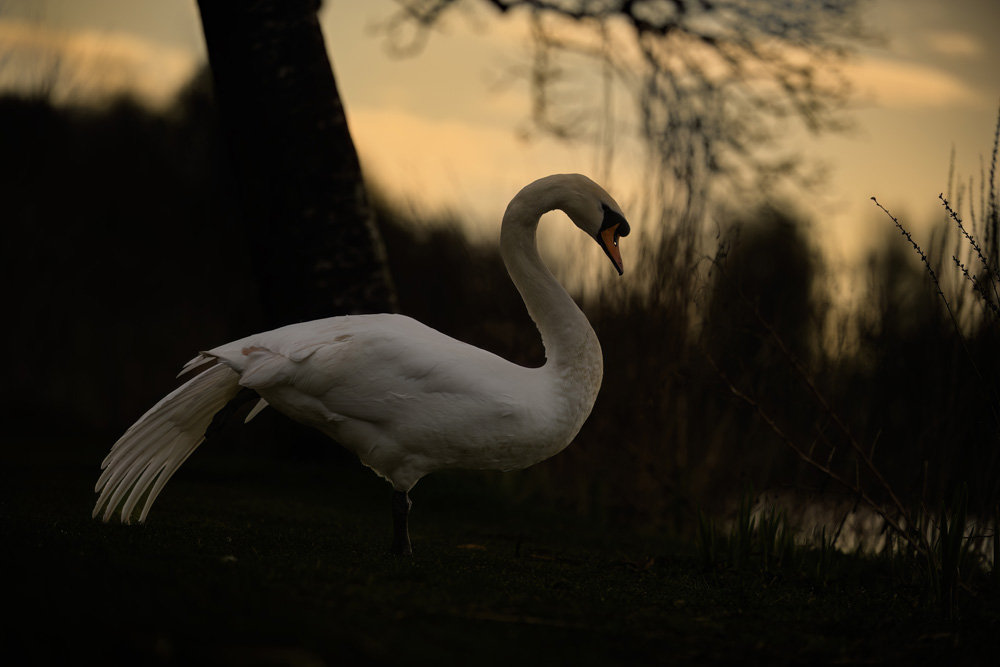
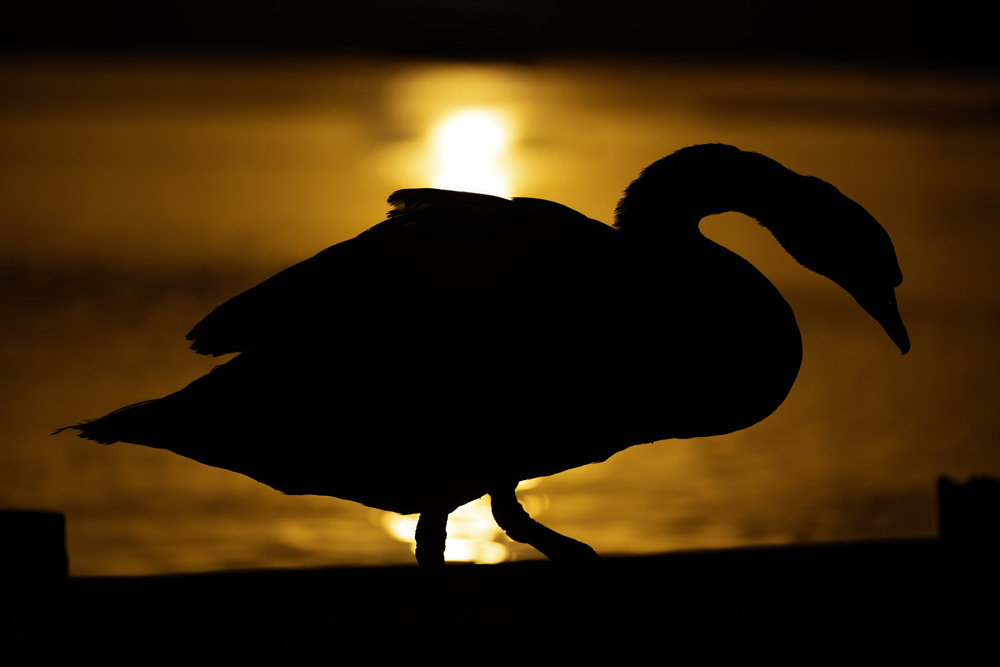
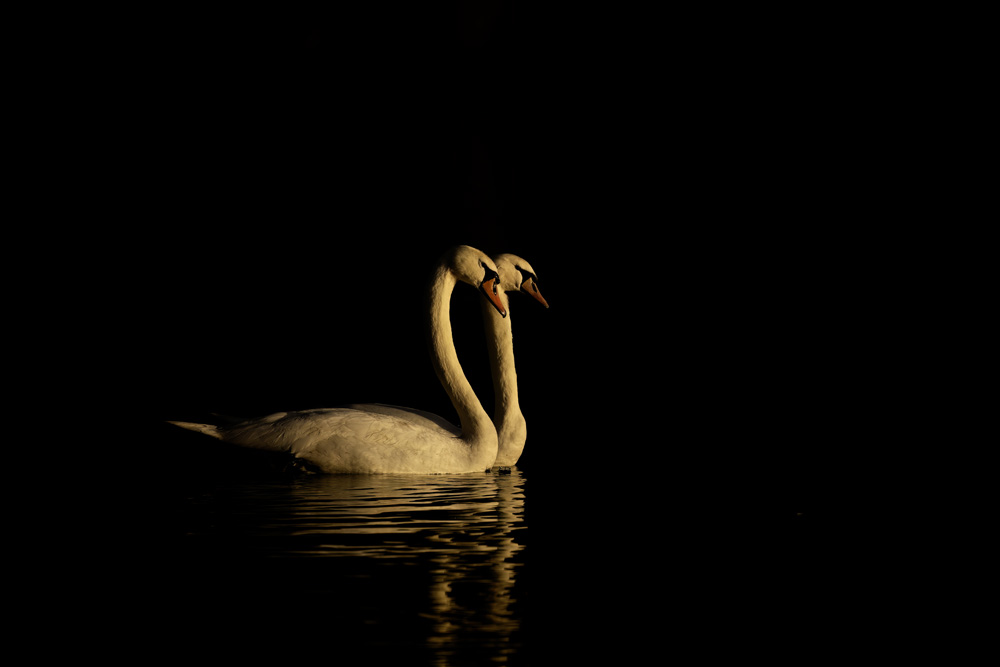
In 2022 I started to set myself photographic goals of photographing common species in a different way. This turned out to be the one thing that improved my photography more than anything else I had ever done. I picked a location – a local urban loch which on first impressions was uninspiring photographically and picked a subject – swans and then set about trying to photograph them in a different way using the available light and backgrounds to try to create something completely different. After a while I built up a strong portfolio of images that I was proud of. This location and this approach then became the foundation of my very successful beginners and advanced workshops which I launched in 2024.
I have all of my images saved in a portfolio folder and using Adobe Bridge (you can also use Lightroom) I have key worded all of the images with
Country – I photograph wildlife in multiple countries
Location – The exact location the subject was photographed in
Subject – The animal or bird in the image
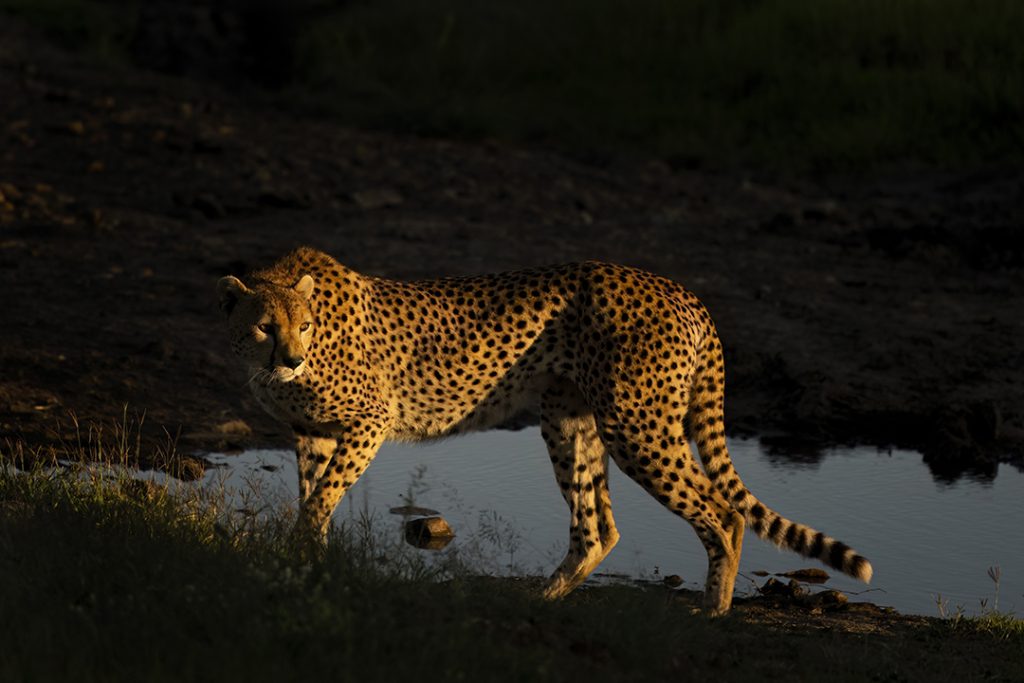
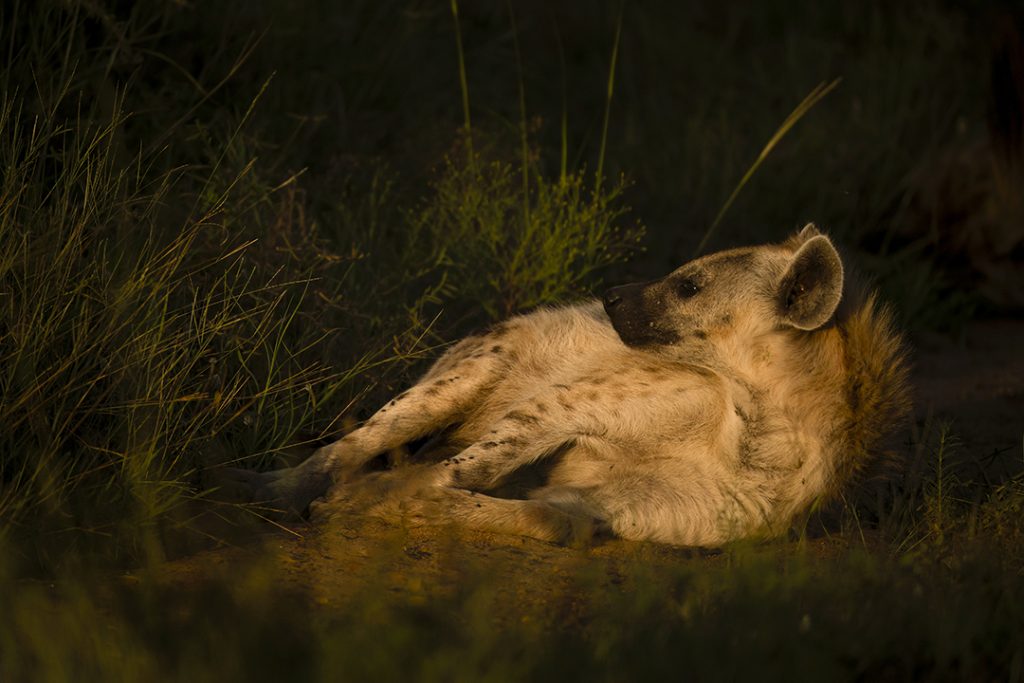
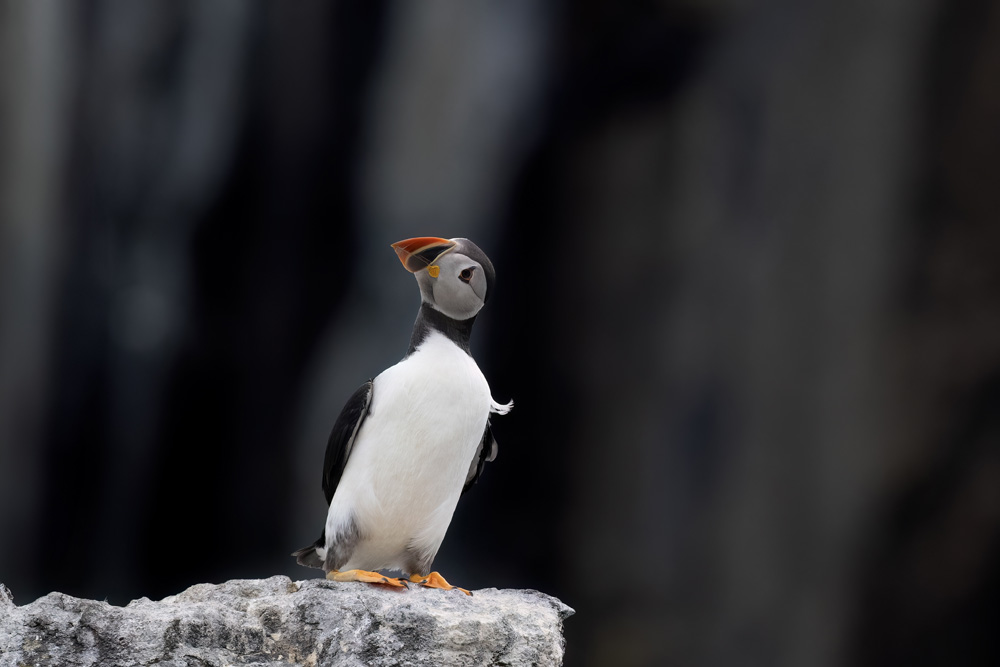
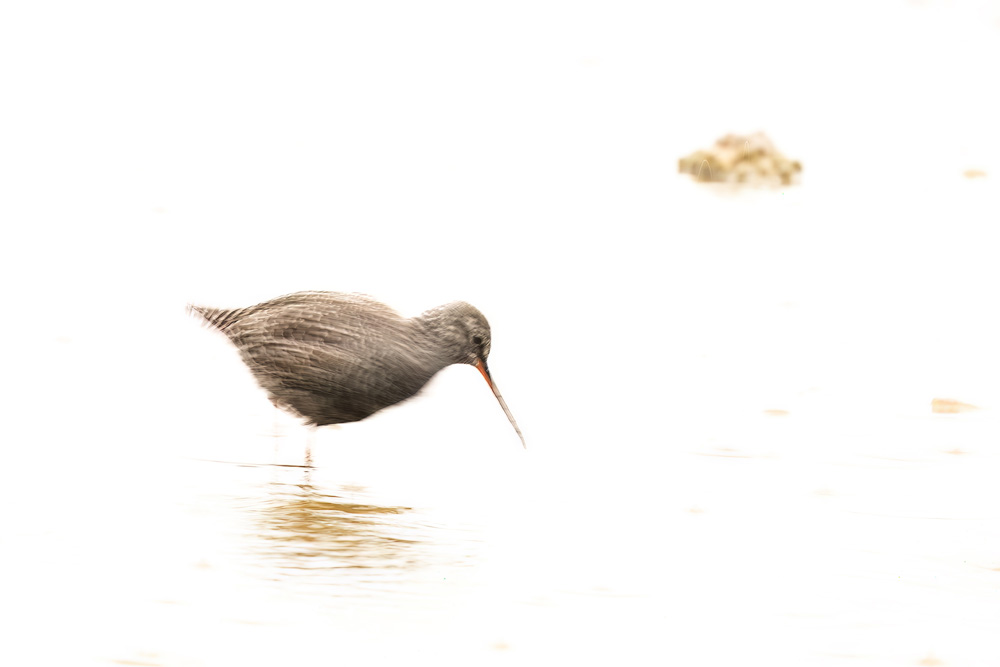
Type of shot – Behaviour, Creative, Portrait, Side Lighting, Backlighting, Sunset, Sunrise, Environmental (some images have more than one of these keywords)
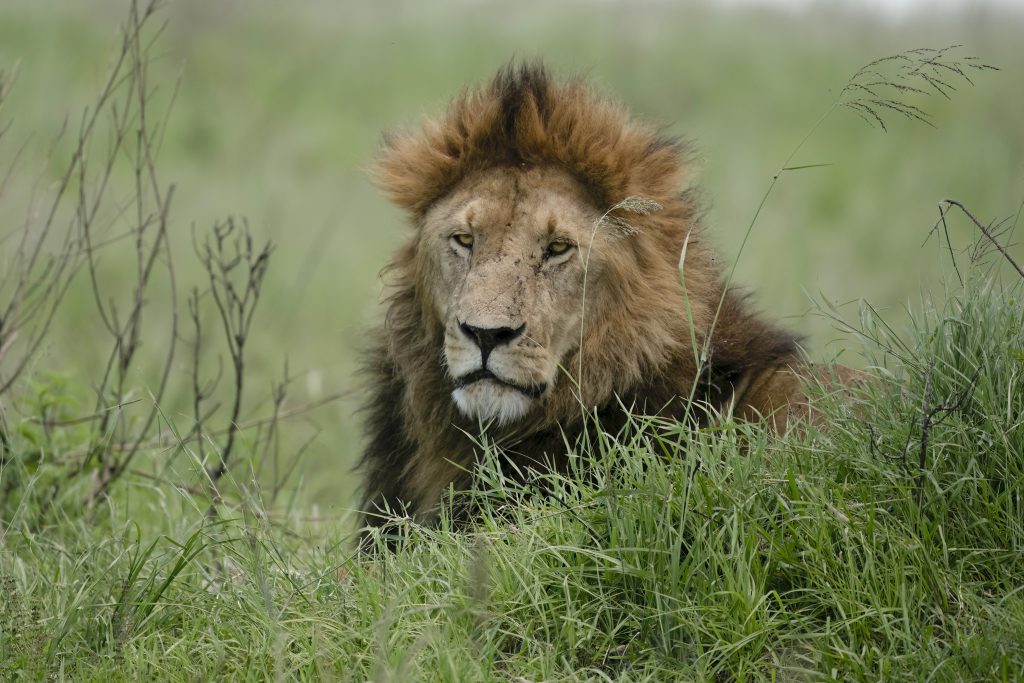
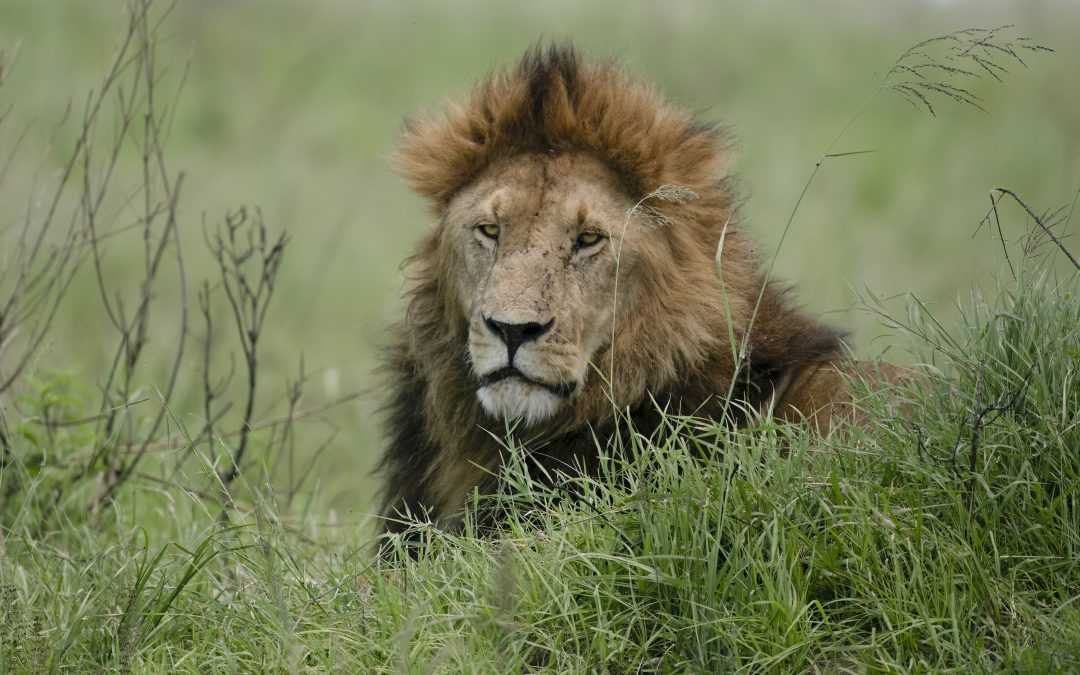
For example the above image is keyworded – Kenya, Masai Mara, Lion, Portrait
That way if I want to ever showcase a portfolio of a location, a country, a subject I can filter for each one.
Start with picking your best images and then keep adding to them. Looking through your work will provide you with opportunities to learn but it will also help you to relive those wonderful moments in the wild and give you the self confidence and reassurance that your work is improving, and you are on the right track.
I have put together the below guide to help you produce a wildlife photography portfolio
Whether you’re building your first portfolio or refining an existing one, this guide will walk you through every step—from planning and curation to presentation and promotion.
1. Define Your Purpose and Audience
Even if it’s just for yourself, clarity helps guide your decisions.
Ask yourself:
- Is this for self-reflection or future professional use?
- Are you starting with one subject and one location or do you have a body of work from several locations with several subjects?
- Do you want to share it with friends, nature groups, or online communities?
- Will it be printed, digital, or both?
This will influence your layout, tone, and platform choice.
Even if you don’t ever plan to show anyone your personal portfolio, It is a good idea to put it together with that objective in mind, this will really help you to pick your very best work and also it will save time if in the future you do decide to present it to someone.
2. Curate Your Best Work
This is the heart of your portfolio. Decide whether you are going to put together a portfolio of all of your work or for a specific species.
Selection Tips:
Start with 50–100 images, then narrow down to 20–30 of your strongest.
For a portfolio showing a selection of all your work Include:
- Diverse subjects (birds, mammals, insects, etc.)
- Different behaviours (feeding, flying, resting)
- Varied environments (forest, water, savannah)
- Unique moments (rare sightings, dramatic lighting)
For a species-specific portfolio
- Different behaviours (feeding, flying, resting)
- Varied environments (look at different backgrounds)
- Unique moments (rare sightings, dramatic lighting)
- Showcase different techniques (be creative with light and camera settings)
- Consistency: A unified style or theme across the portfolio.
Technical Quality:
- Sharp focus on the subject
- Good exposure and contrast
- Clean composition (rule of thirds, leading lines, etc.)
Emotional Impact:
- Does the image tell a story?
- Does it evoke curiosity or awe?
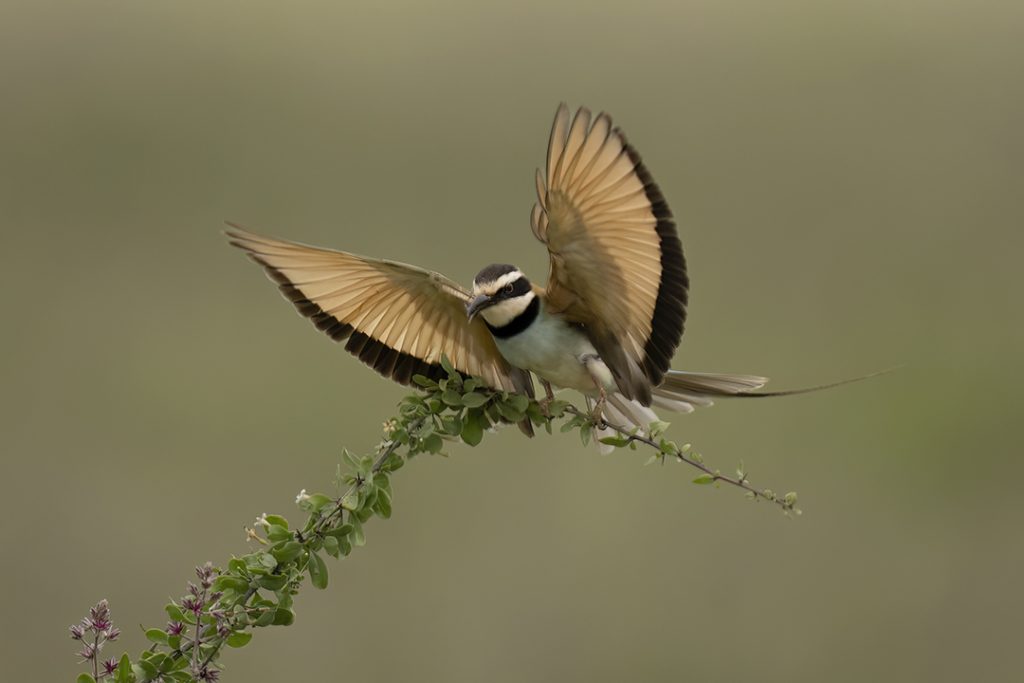
Use a mix of wide shots, close-ups, and action shots to create rhythm and variety. Think of your portfolio as a visual documentary.
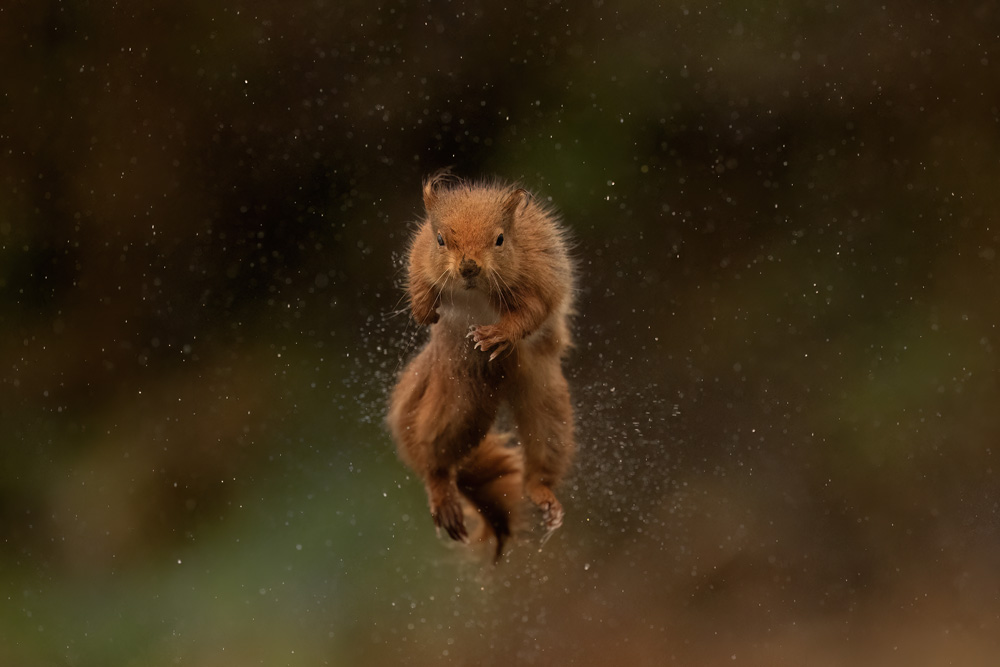
One of the hardest things to do when selecting images is to remove the emotional attachment that you have to a specific image. I really struggled with this. One good example was the first jumping squirrel image I took; I loved the pose and the background and at the time it was the only image I had like it. But…..it was not sharp. It stayed in my portfolio for years and then eventually I removed it because it was just not of the quality of the other images. I have since taken other similar images (like the one below) and they have replaced this one.
3. Keep It Fresh and Relevant
Your portfolio should evolve as your skills and experiences grow.
Update Regularly:
- Replace older images with stronger, newer ones.
- Add new species, locations, or behaviours.
- Reflect changes in your style or conservation focus.
Clean Up:
Remove duplicates, overly similar shots, or anything that doesn’t align with your current goals.
You could even keep a “Year in Review” section to track progress.
4. Organize by Theme or Structure
A well-organized portfolio makes it easier to navigate and appreciate.
Possible Structures:
- By Species: Birds, Mammals, Reptiles, Amphibians
- By Region: Scotland, Highlands, Africa, India
- By Season: Spring, Summer, Autumn, Winter
- By Behaviour: Hunting, Nesting, Migration, Interaction
- If just one subject then I would suggest structuring it with portraits, behaviour, different light, creative shots etc
You can use folders, galleries, or chapters depending on your format.
My advice is to start with key wording all of the images that are your best and then think about how you would present the images.
5. Add Captions and Context
This adds depth and shows your expertise.
Include:
- Common and scientific name (e.g., Red Fox – *Vulpes vulpes*)
- Location and date (e.g., Cairngorms National Park, May 2023)
- Camera settings (useful for learning)
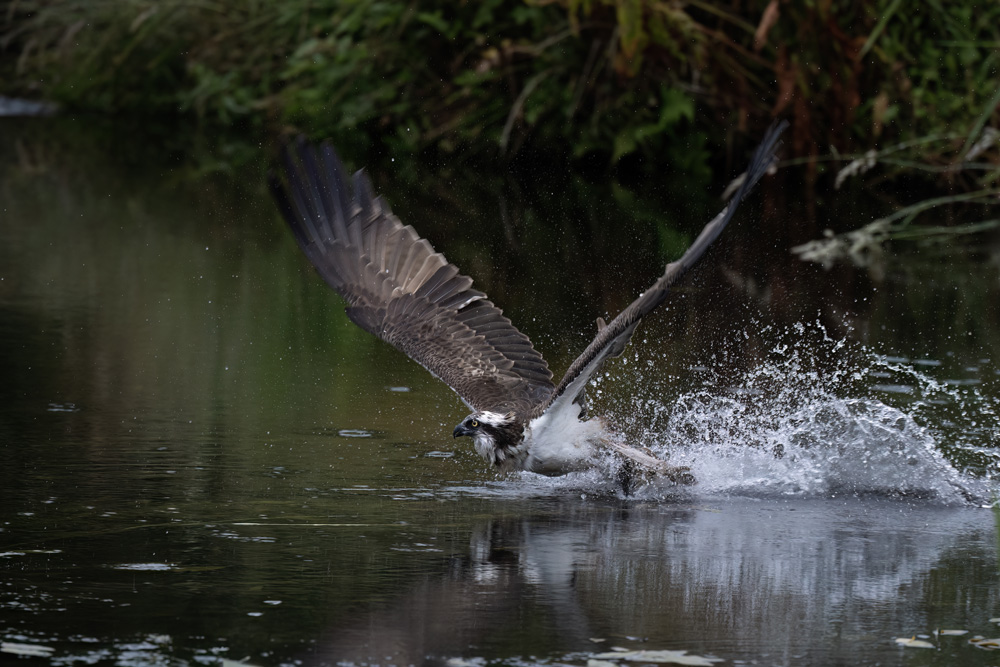
- Short story or observation (e.g., “This osprey had just caught a trout and flew directly overhead.”)
This transforms your portfolio into a visual journal. It also helps you to put your images in some kind of order and if you add the camera settings then it is useful for helping you to learn how you have created an image and the process that went into it.
Add a Personal Touch
Make it uniquely yours. In the beginning this is everything that you can add in to make the portfolio truly yours. Don’t worry if it sounds silly or doesn’t make sense to anyone but you. This is adding everything that makes your image different from everyone else.
Ideas:
- Short bio: Who you are, what inspires you
- Artist statement: Your philosophy or approach to wildlife photography
- Behind-the-scenes shots: Show your setup, gear, or fieldwork
- Map of locations: Visualize where you’ve photographed
- Gear list: Share what you use and why
7. Choose a Format
Here are some great options depending on your goals:
Digital Portfolio – consider presenting your images on a website.
Website Builders:
- [Adobe Portfolio](https://portfolio.adobe.com) – free with Creative Cloud
- [Wix](https://www.wix.com) – drag-and-drop, customizable
- Squarespace – elegant templates
- SmugMug – built for photographers
PDF or eBook – simple and easy to do. I create mine in PowerPoint and then save it as a PDF.
- Use PowerPoint, Canva, Adobe InDesign, or Affinity Publisher
- Great for offline sharing or printing
Cloud Folder – useful for backing up your portfolio and easily being able to show others.
- Google Drive, One Drive or Dropbox
- Backblaze – unlimited storage for a low yearly fee.
- Organize folders with clear naming and add a README file with descriptions
As I stated above, I have my digital portfolio which is keyworded as I described, but if I am asked to do a talk or presentation, I will then pull images from my portfolio to put in to a different format.

Images in my lion folder
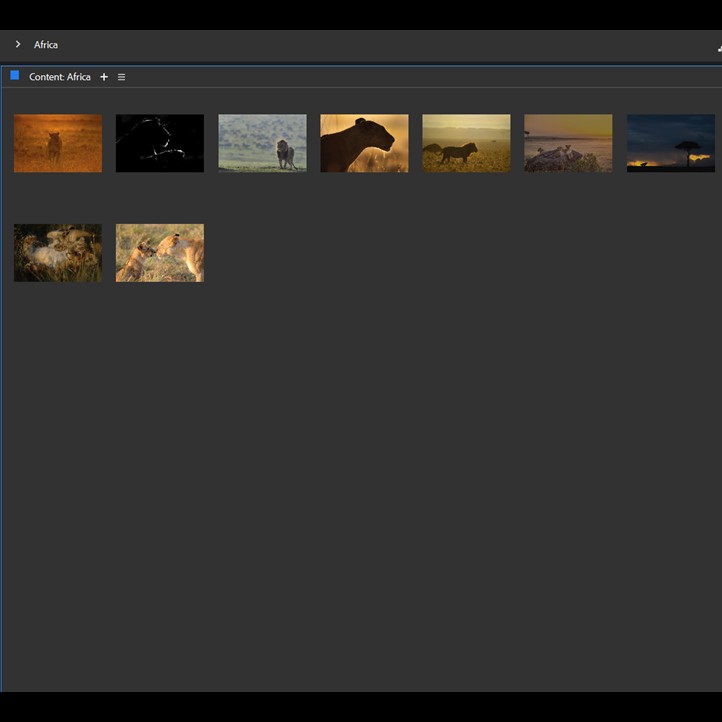
Images filtered for light
Physical Portfolio
It is always nice to see your images in print, but it can be costly to do this. Refine your portfolio before you consider these options.
Printed Photo Book:
- Blurb, Shutterfly, or Cewe
- Choose matte or glossy paper, hardcover or softcover
Portfolio Binder:
- Use archival-quality sleeves
- Include printed captions or notes
Once you have spent time on your personal portfolio and used it to learn from you can then consider using the portfolio for other purposes. Some additional considerations here are mentioned below:
Define Your Purpose and Audience
Before you start selecting images, clarify your goals. This will shape every decision you make.
Ask Yourself:
Why am I creating this portfolio?
- To attract clients or agencies?
- To apply for grants or competitions?
- To sell prints or license images?
- To raise awareness for conservation?
- To advertise workshops and tours?
Who is my audience?
- Editors and publishers
- Art buyers and gallery curators
- NGOs and conservation groups
- Social media followers
- Prospective Clients
Tailor Your Portfolio Accordingly:
- For editorial work, focus on storytelling and diversity.
- For fine art, emphasize composition, mood, and print quality.
- For conservation, highlight endangered species and ethical practices.
Update your captions. Captions educate your audience and show your depth of knowledge. They also help editors and curators understand the significance of your work.
Master the Art of Editing
Editing is where your images come to life. It’s also where consistency is built.
Editing Tips:
- Use tools like Lightroom or Camera Raw for non-destructive editing.
- Maintain natural colours unless you’re going for a stylized look.
- Avoid excessive sharpening or saturation—wildlife should feel real.
- Crop thoughtfully to enhance composition without losing context.
Test Your Edits:
View your portfolio on different screens and in print to ensure consistency across formats.
Revisit your Artist Statement or Bio
This is your chance to connect personally with your audience. Before everything was personal to you. Now fine tune what you did when your portfolio was private to you and rather than recording your thoughts, use those thoughts to tailor it to the audience you are presenting your portfolio to.
What to Include:
- Your background and journey into wildlife photography
- Your artistic philosophy or conservation mission
- Notable achievements or exhibitions
- Contact information and social links
Tone:
Keep it authentic, passionate, and professional. Let your love for wildlife shine through.
Seek Constructive Feedback
Before publishing or printing your portfolio, get feedback from trusted sources.
Ask:
- Fellow photographers
- Editors or mentors
- Conservation professionals
- Your target audience
What to Look For:
- Are the images compelling and cohesive?
- Is the layout intuitive and engaging?
- Does the portfolio reflect your unique voice?
Final Thoughts
A personal wildlife photography portfolio becomes a diary of your personal development and progress; it can record your evolving style your improvements and your mistakes. But it is easy to turn this into a showcase of your best work. A Public Portfolio —is a statement of your vision, ethics, and dedication to the natural world. With thoughtful curation, consistent editing, and a clear narrative, your portfolio can inspire, educate, and open doors to exciting opportunities.
Your wildlife photography portfolio is a reflection of your journey, passion, and growth. Whether you’re photographing swans at a local loch or lions in the Masai Mara, your portfolio should tell a story, inspire others, and showcase your dedication to the natural world.
Ready to take the next step?
If you’d like a professional review of your wildlife photography portfolio, I offer online and in-person portfolio consultations. Get in touch to schedule yours!
If you review your portfolio and feel like you want to learn some new techniques then check out my workshops