
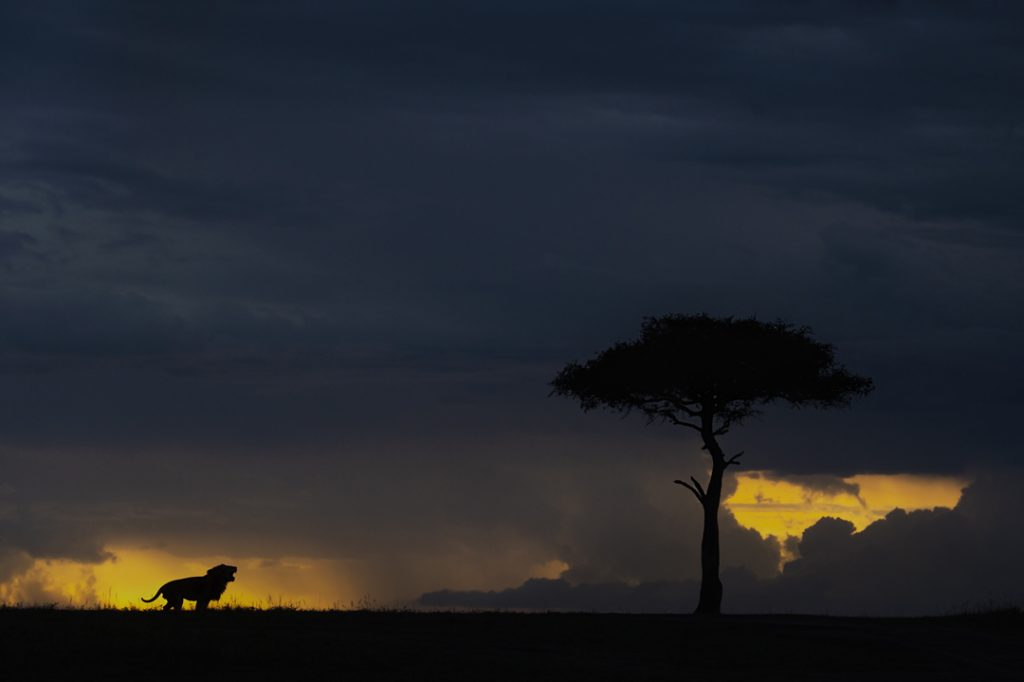
How to Photograph Wildlife Silhouettes:
Wildlife silhouettes are among the most striking and emotionally evocative images in nature photography. By reducing subjects to their outlines against vibrant skies or glowing horizons, photographers can create powerful compositions that emphasize shape, mood, and mystery. Here’s how to master the art of wildlife silhouette photography.
1. Understand What Makes a Silhouette
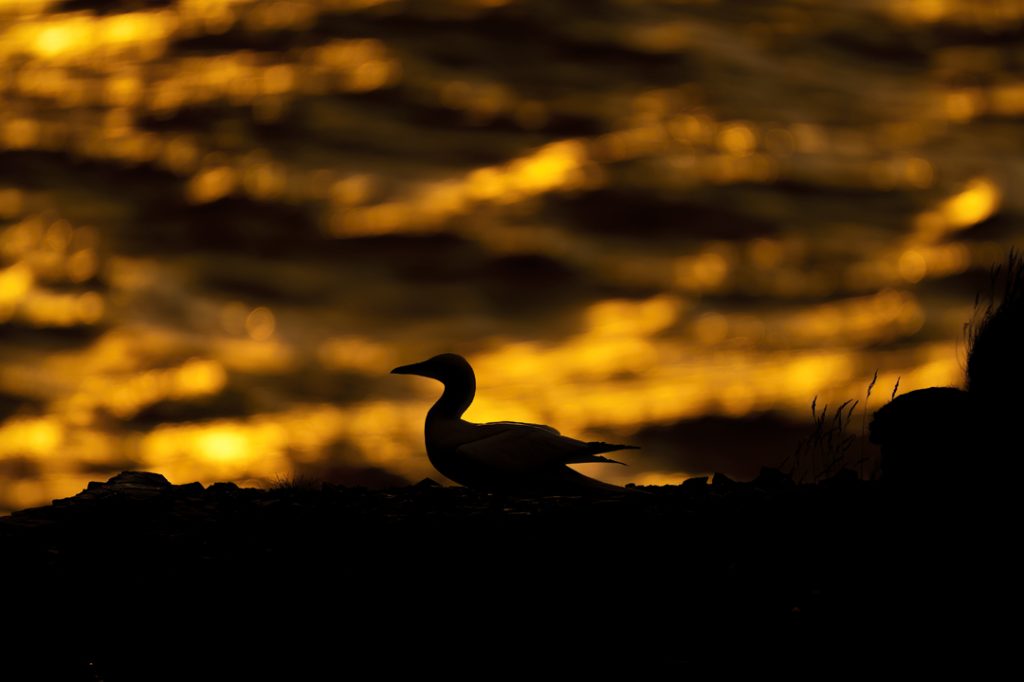
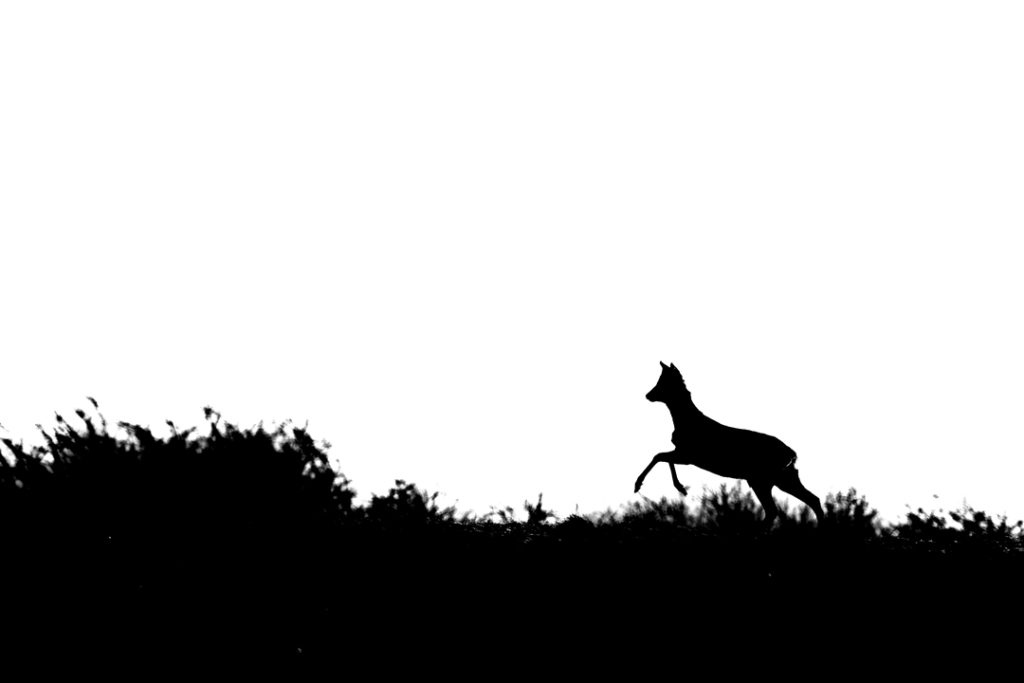
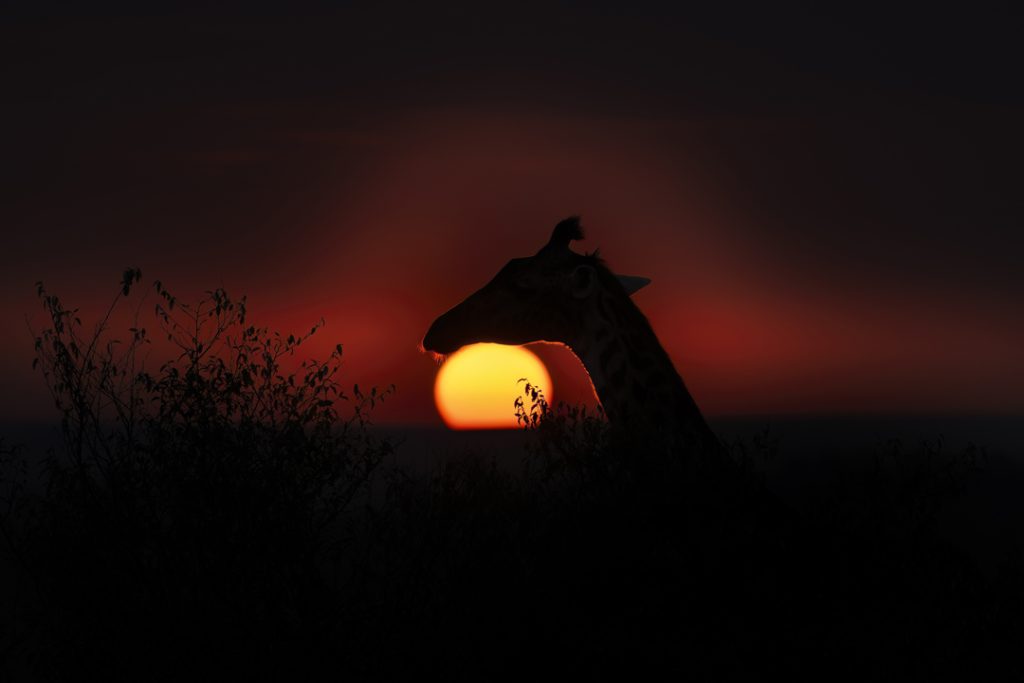
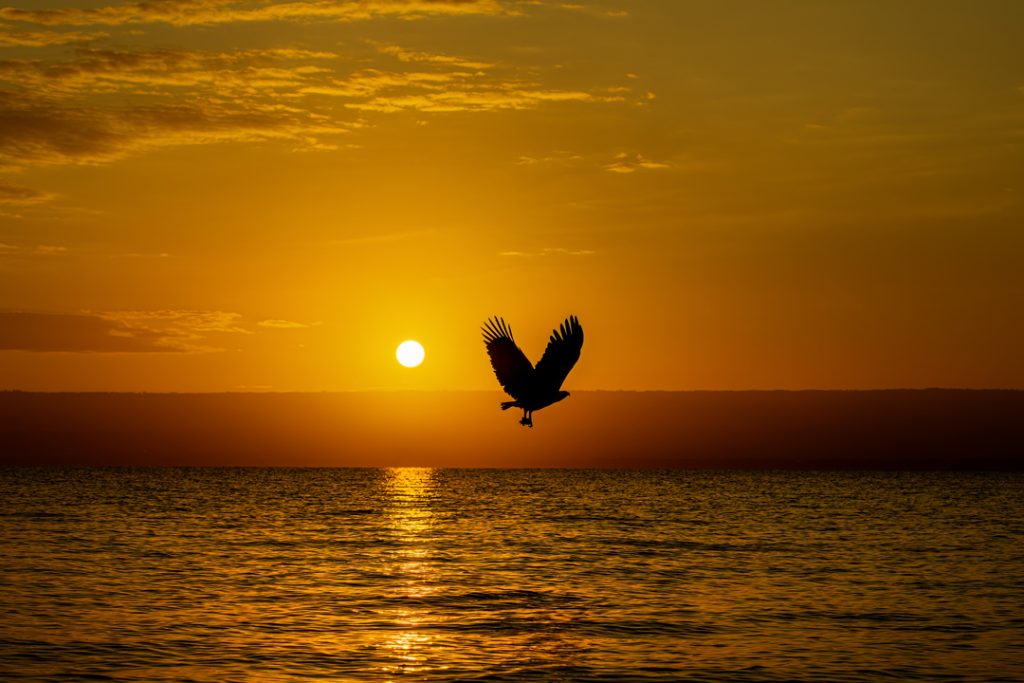
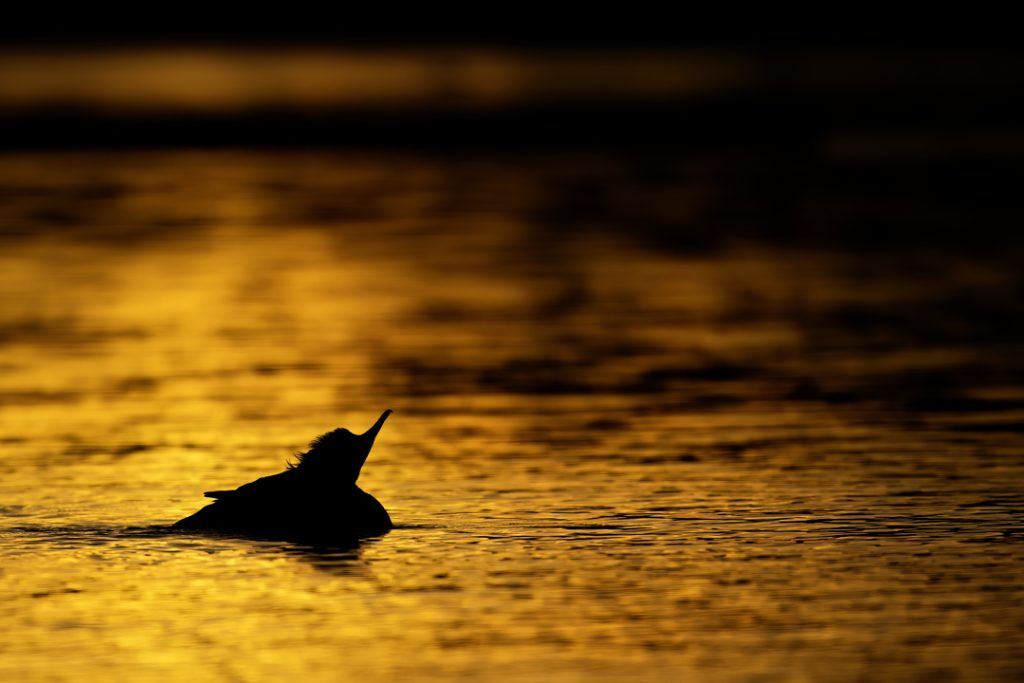
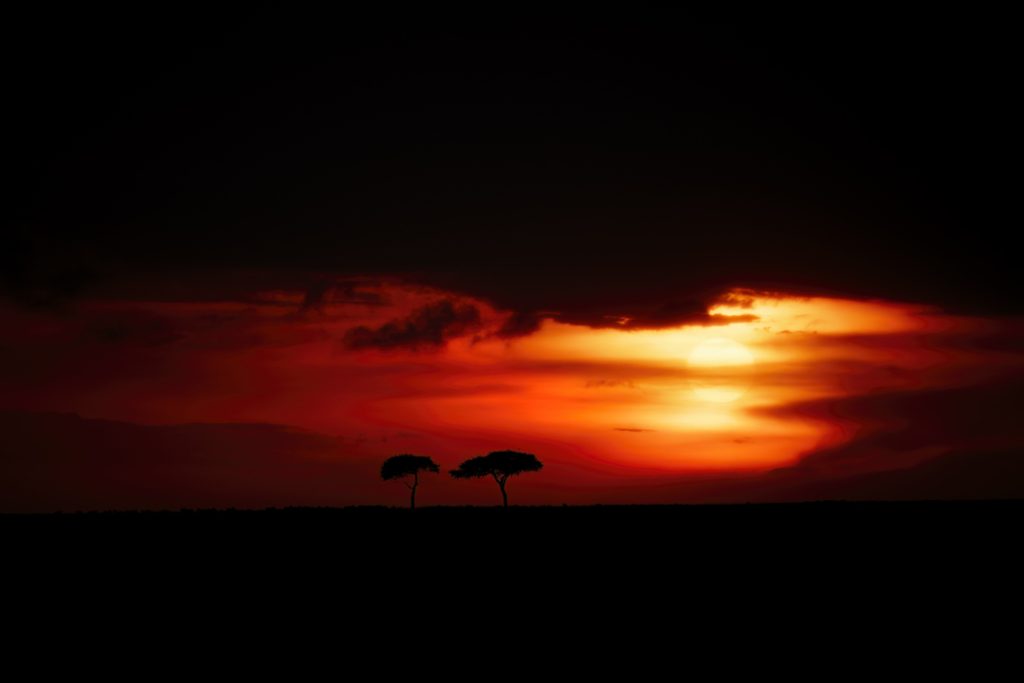
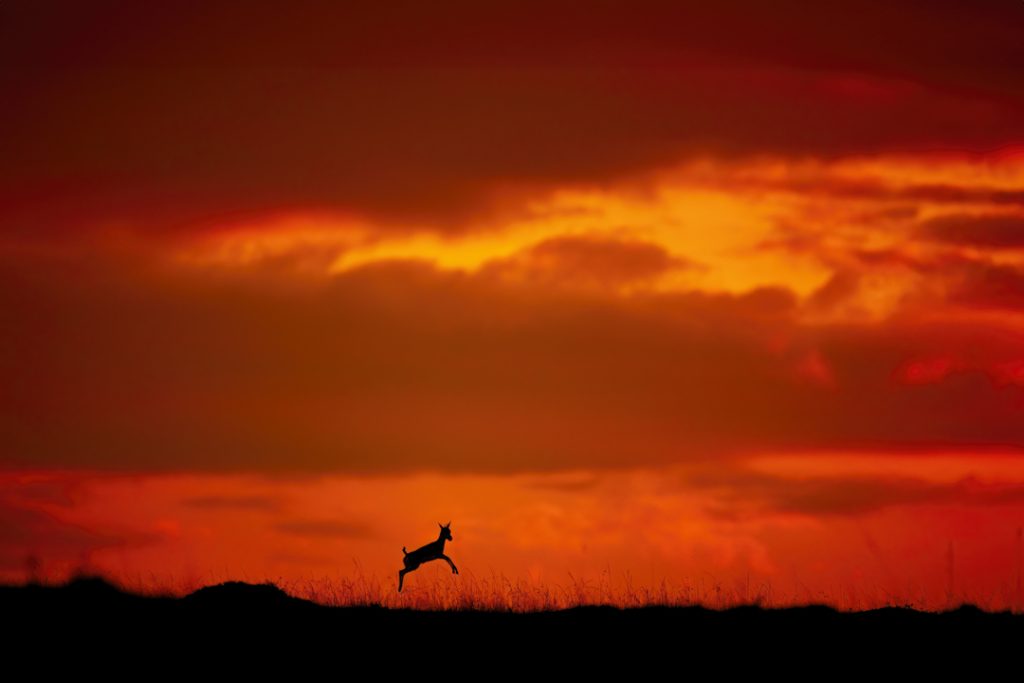
A silhouette occurs when a subject is backlit—meaning the light source is behind the subject—causing the subject to appear dark against a brighter background. In wildlife photography, this often means capturing animals against sunrise or sunset skies.
Key Elements:
- Strong backlight (sunrise/sunset)
- Clear subject shape (recognizable outline)
- High contrast between subject and background
As much as sunset and sunrise provides some stunning colour and interest in the image. Silhouettes can be done in the following situations too:
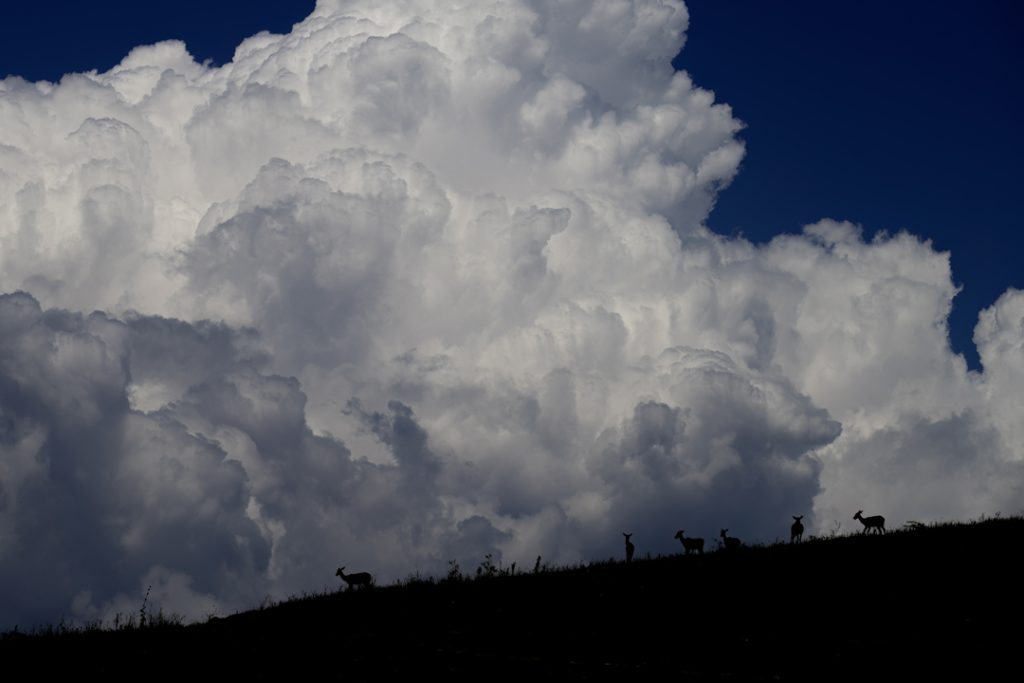
- Against grey skies – convert to black and white for maximum impact
- Against skies that have a lot of clouds and contrast between blue and white.
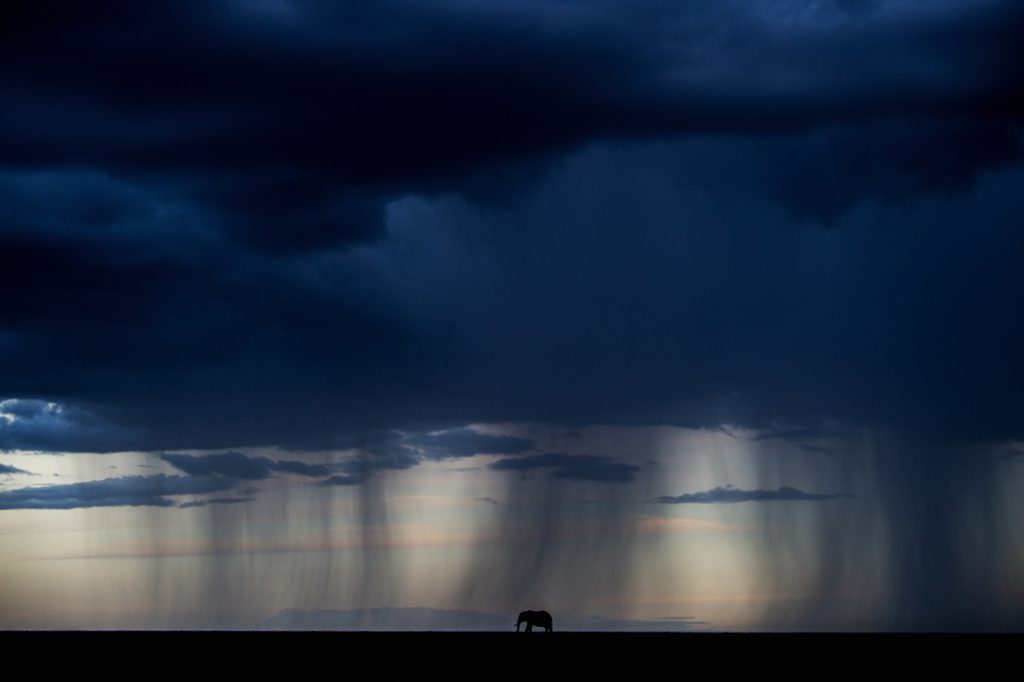
- Against stormy skies – some of the colours that you get with storm clouds are breathtaking and can be used very creatively.
2. Choose the Right Time of Day
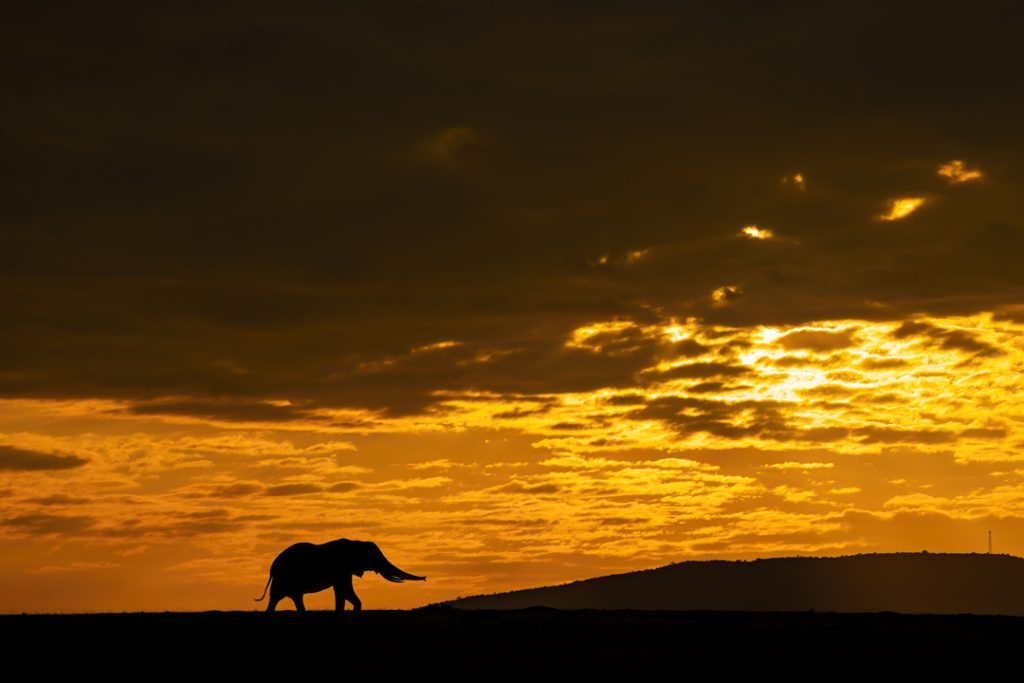
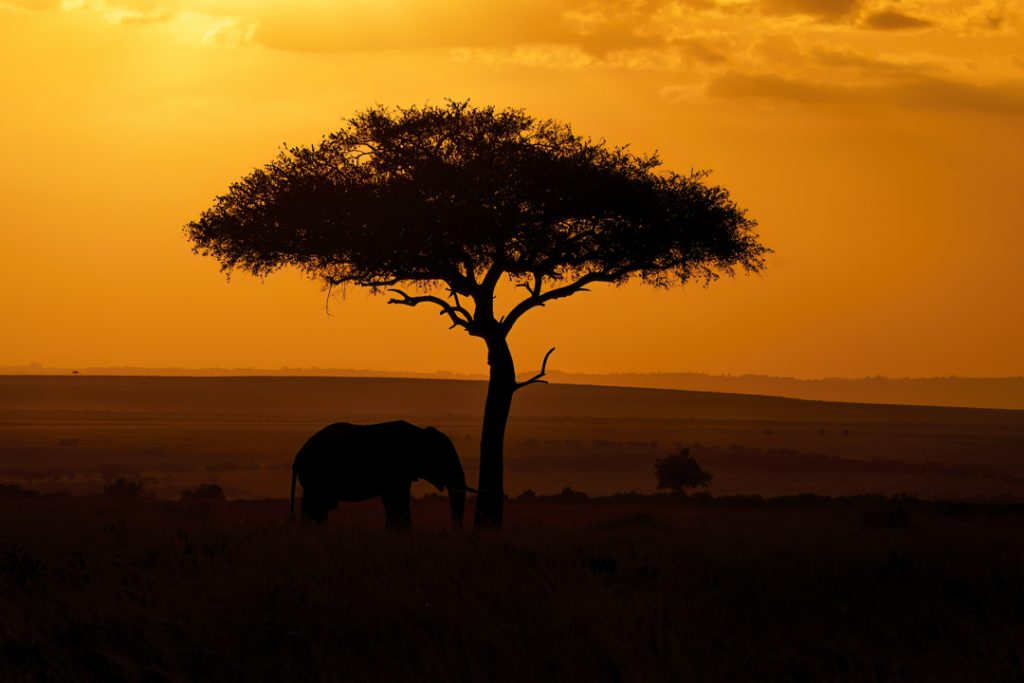
If we reconsider the traditional beautiful sky silhouettes. The golden hours—just after sunrise and just before sunset—are ideal for silhouette photography. The low angle of the sun creates dramatic lighting and colourful skies that enhance the mood of your image.
Tips:
- Arrive early to scout locations and observe animal behaviour.
- Stay late to catch the last light and experiment with different compositions.
- Get familiar with a location and what may work in the future.
3. Position Yourself Strategically
To create a silhouette, you need to shoot toward the light source. This means placing yourself, so the animal is between you and the sun.
Positioning Tips:
- Get low to the ground to isolate the subject against the sky.
- Use hills, trees, or water reflections to add depth and interest.
- Make creative decisions in regards to what you leave in or eliminate from the scene, does a tree detract or add to the silhouette and scene?
4. Recommended Settings
Auto exposure can struggle with silhouettes, often overexposing the subject. Instead, switch to manual mode with Auto ISO or Aperture Priority with Auto ISO and use exposure compensation to darken the subject.
Recommended Settings:
- Meter for the sky, not the subject.
- Underexpose slightly to deepen shadows. Depending on how bright the sky is -1 under usually works well
- Use a small aperture (f/8–f/16) for sharp outlines. This is particularly important, especially if the sun is included in the scene.
- Auto ISO will always select the lowest ISO possible to give you the relevant exposure.
- Set Cloud or Shade White Balance rather than Auto. This is key. If you have taken underwhelming sunsets and sunrises in the past, the reason for this is that the camera applies a correction to remove the red and orange in the sky which it recognises as a colour cast. By selecting shade or cloudy white balance the camera will then warm the scene up and will therefore preserve the sunset and sunrise colours.
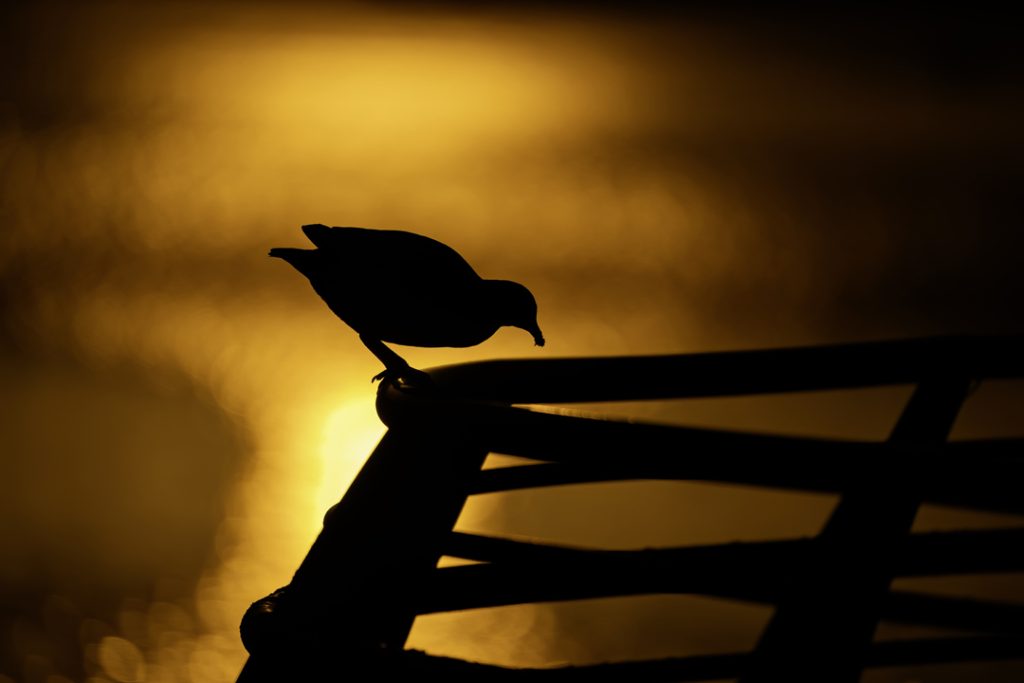
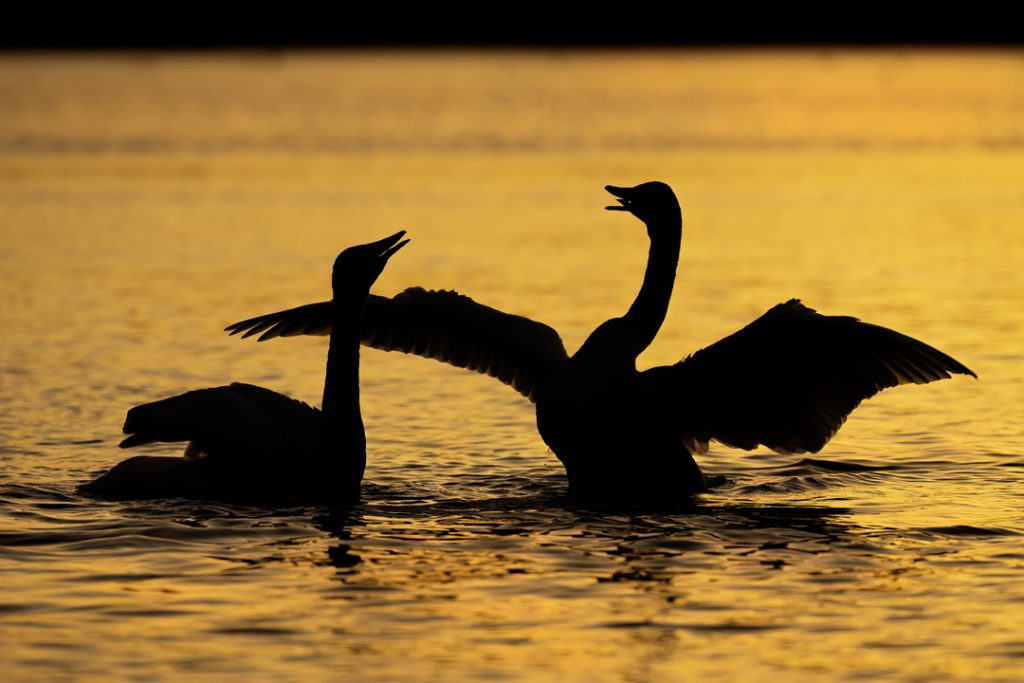
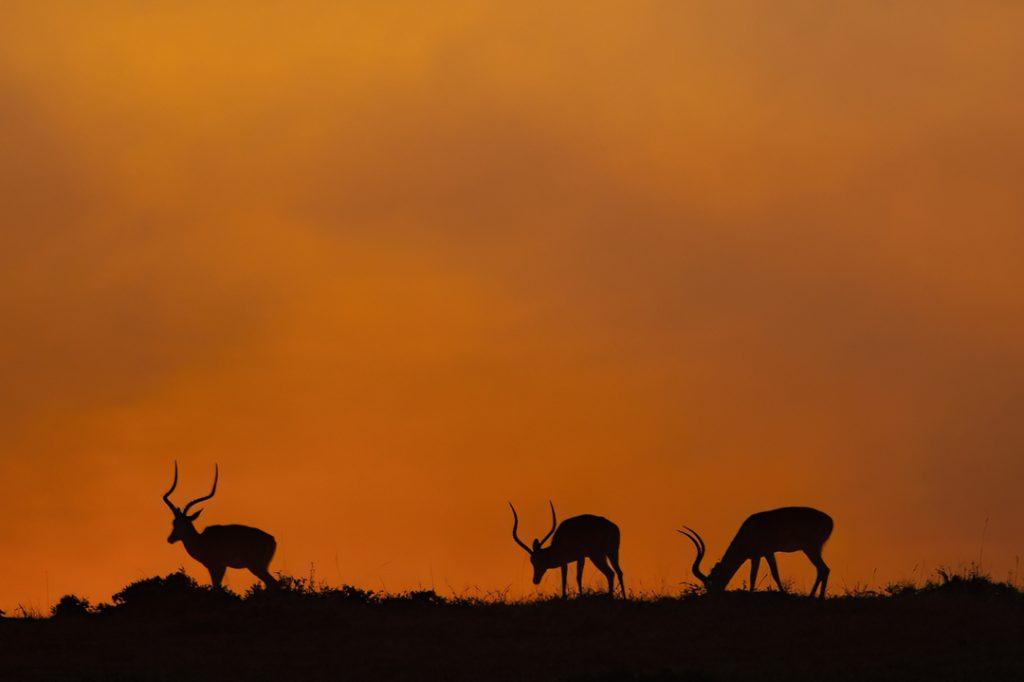
5. Focus on Shape and Gesture
Since detail is lost in silhouettes, the shape and posture of the animal become crucial. Look for:
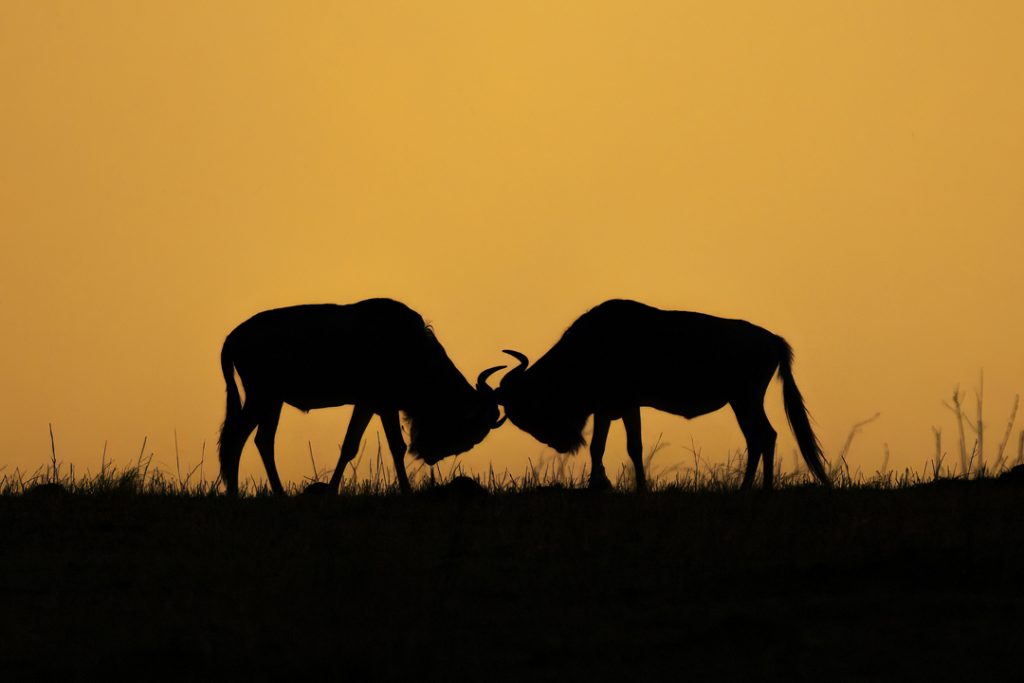
- Recognizable species outlines (e.g., antlers, wings, trunks)
- Interesting poses (e.g., howling, flying, drinking)
- Interaction between animals for storytelling
6. Compose Creatively
Silhouettes thrive on minimalism and strong composition. Use techniques like:
- Rule of thirds to place subjects off-center
- Negative space to emphasize isolation or mood
- Leading lines from landscape features to guide the eye
- I have mentioned this before but what you choose to include or remove in the image is critical.
7. Post-Processing for Impact
Editing can enhance the drama of your silhouette shots:
- Increase contrast to deepen shadows
- Reduce Blacks and Increase whites and highlights to make the silhouette “pop”.
- Boost vibrance/saturation/colour temperature to enhance the colourful skies
- Crop for better composition
- Remove distractions to keep focus on the subject
8. Practice Patience and Ethics
Wildlife photography requires patience and respect. Always:
- Keep a safe distance
- Avoid disturbing animals
- Use long lenses (300mm+) to capture detail without intrusion
Conclusion
Photographing wildlife silhouettes is a blend of technical skill, artistic vision, and understanding of shape, form and behaviour. With the right light, thoughtful composition, and ethical approach, you can create images that are both visually stunning and emotionally resonant.
To read more about different creative techniques then check out these blog posts on panning and exposure compensation
To read more on the importance of light in wildlife photography then click here
If you want to learn more then why not join me on a workshop where we delve in to light, creativity and silhouettes
Or for the ultimate in wildlife photography experiences then join me on a safari in Kenya