How to Photograph a New Wildlife Destination
Venturing into a new wildlife destination is thrilling—but it can also be overwhelming. Unknown terrain, unfamiliar species, and unpredictable conditions mean preparation is key. Here’s a comprehensive guide to help you plan, shoot, and succeed.
1. Do Your Homework Before You Travel
Research is the foundation of great wildlife photography:
- Species Knowledge: Identify target species and learn their habits—feeding times, breeding seasons, and behaviours. For example, big cats are most active at dawn and dusk, while primates may be more visible during midday.
- Habitat Insights: Understand the ecosystem. Wetlands, forests, and savannahs each require different approaches and gear.
- Seasonal Timing: Migration periods, mating seasons, and dry spells can dramatically affect sightings.
- Local Rules & Permits: Many parks require photography permits or restrict off-road driving. Breaking rules can lead to fines or harm wildlife.
- Discuss with your tour company: Be very clear about your photographic goals when discussing with your travel company. Listen to their advice.
- Research images online taken in your chosen destination: Don’t copy these images but use them to provide inspiration for your own creativity.
- Consider a Photo Safari: A photo safari should take care of all of the above – it is the photographic guides responsibility to put you in the best places to use the best light and backgrounds to create some interesting and different images.
Pro Tip: Use apps like Merlin Bird ID or local wildlife guides to familiarize yourself with species before you arrive.
2. Build a Location Strategy
Once you arrive:
- Scout Early: Dedicate your first day to exploring. Look for animal tracks, droppings, and feeding signs.
- Get used to the light: All destinations have the same direction of light but different intensities
- Talk to Locals: Rangers and guides know hotspots and animal routines—tap into their knowledge.
- Discuss with your guide: Explain what you are hoping for photographically don’t focus so much on the species but more on the backgrounds and landscapes that you have seen.
- Map Key Zones: Mark waterholes, fruiting trees, or open clearings where wildlife congregates.
Pro Tip: Edge habitats (where two ecosystems meet) often attract diverse species—perfect for photography.
3. Gear Up for Success
Remember that all airlines have cabin luggage limits and they are getting a lot stricter with enforcing them. So only take what you think you will need. Discuss this with your tour company or organiser.
Your equipment should match the destination: For example a zoom lens is perfect for a safari when the subjects will be at different distances, it gives you far more flexibility whereas something like a long 600mm prime lens with teleconverter may be the chosen lens for snow leopards when a lot of the views are distant.
- Camera: A DSLR or mirrorless with fast autofocus and high burst rates.
- Lenses:
Telephoto (200–600mm) for distant subjects.
Wide-angle for dramatic landscapes and environmental portraits.
Rain covers for tropical or unpredictable weather.
Extra batteries and memory cards—wildlife shoots can be long.
Pro Tip: If traveling light, choose a versatile zoom lens (e.g., 100–400mm) and ask your tour company to provide a beanbag for vehicle-based shooting.
4. Master Light and Timing
- Golden Hours: Early morning and late afternoon offer soft light and peak animal activity.
- Overcast Days: Ideal for reducing harsh shadows and capturing rich colours.
- Night Photography: If permitted, use fast lenses and spot lighting carefully to avoid disturbing animals.
- Dappled Sunlight: If there are forest areas make sure you are familiar with the techniques needed to photograph in this environment.
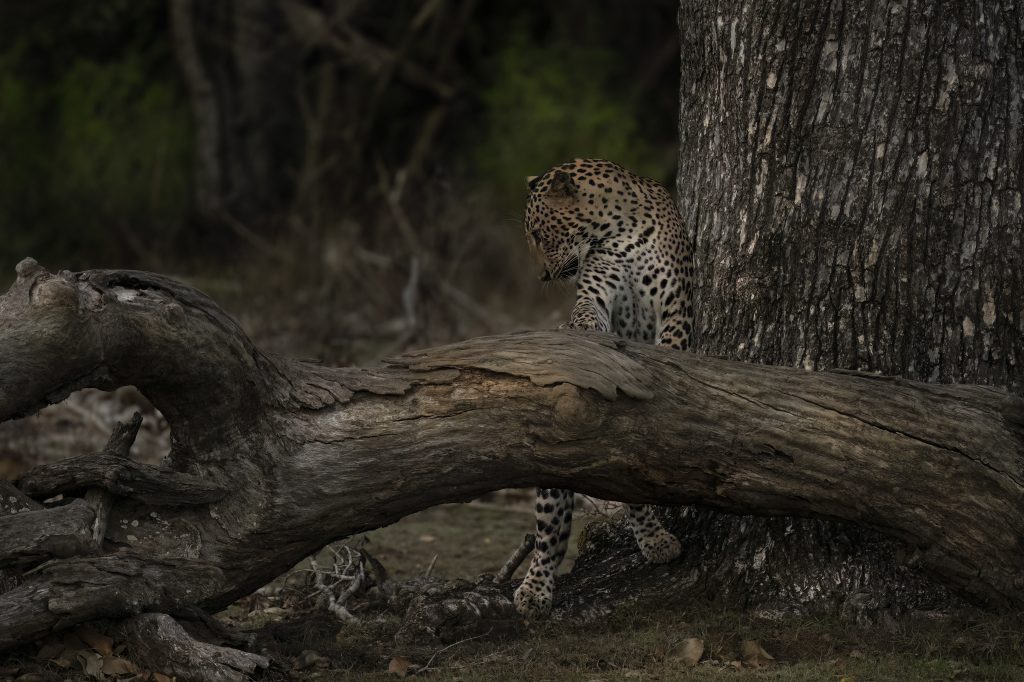
Check with your tour operator that you will make the most of the best times of day for light. For example if you are not leaving the lodge until 9am on a Kenya Safari you have already missed the best moments of the day or if you don’t do a full day in the Sri Lankan Forest looking for leopards then you miss the key middle of the day time when the sun is overhead and shining through the trees creating beautiful dappled light.
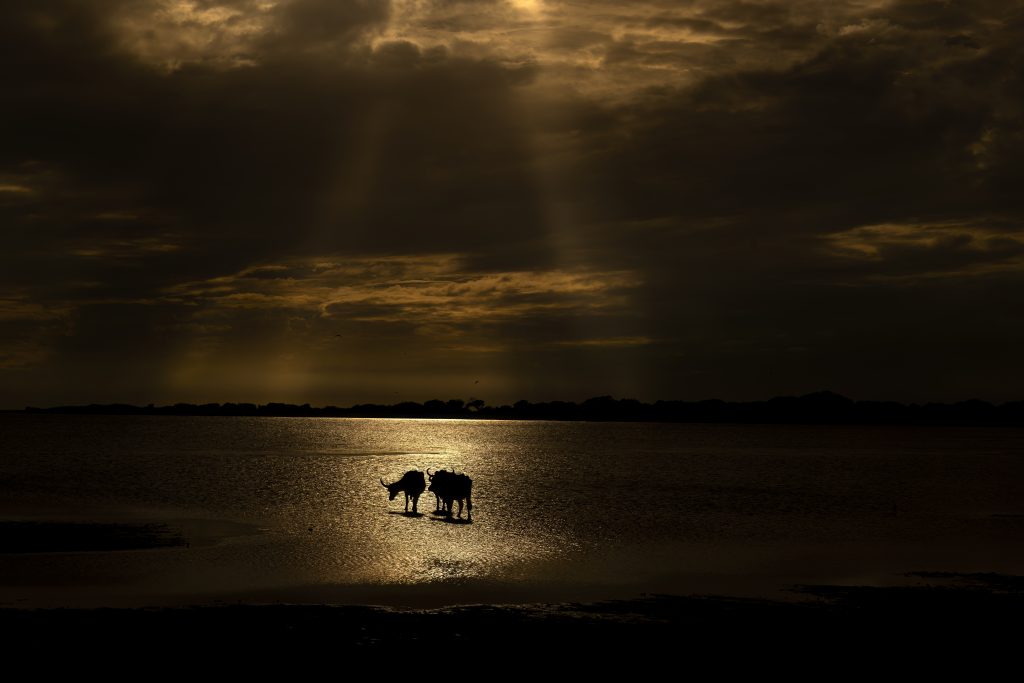
Pro Tip: Position yourself with the sun behind you for well-lit subjects—but experiment with backlighting for creative silhouettes.
5. Learn and Adapt to Animal Behaviour
- Observe Before Shooting: Spend time watching—anticipation beats reaction.
- Predict Movements: Animals often follow patterns; knowing these helps you prepare for action shots.
- Stay Patient: Wildlife photography is about waiting for the perfect moment.
- Visit a Zoo: If you have never seen a leopard then go to a zoo and spend time photographing a leopard and watching its behaviour. Captive animals are not the same as wild animals but some of their behaviours will be the same.
Pro Tip: Keep your camera ready with appropriate settings—wildlife moments are fleeting. Set up for action and then adjust from there. I always make sure that my camera is set at 1/1000s. Aperture wide open (lowest number). Auto ISO and Auto WB. Then adjust from there.
6. Ethics and Safety First
- Respect Distance: Use long lenses instead of approaching animals.
- No Baiting or Disturbance: It’s harmful and unethical.
- Personal Safety: Carry first-aid kits, wear neutral clothing, and know emergency contacts.
- Local Customs: Be familiar with local customs so that you do not cause offence
- Stick to the park/reserve rules: They are there to protect the environment and the welfare of the wildlife
Pro Tip: Follow the “Leave No Trace” principle—your presence should never alter animal behaviour.
7. Organize and Back Up Daily
- Sort and tag images each evening.
- Back up to multiple sources (external drive + cloud)be aware that in some locations the internet may not be the best so consider taking 2 external drives to store all of your images.
- Note species names and locations for accurate captions.
Pro Tip: Use software like Lightroom for quick edits and cataloguing.
8. Tell a Story
Don’t just capture portraits – document:
- Behaviour: Feeding, grooming, hunting.
- Interactions: Parent-offspring, predator-prey.
- Habitat Context: Show the environment for a sense of place.
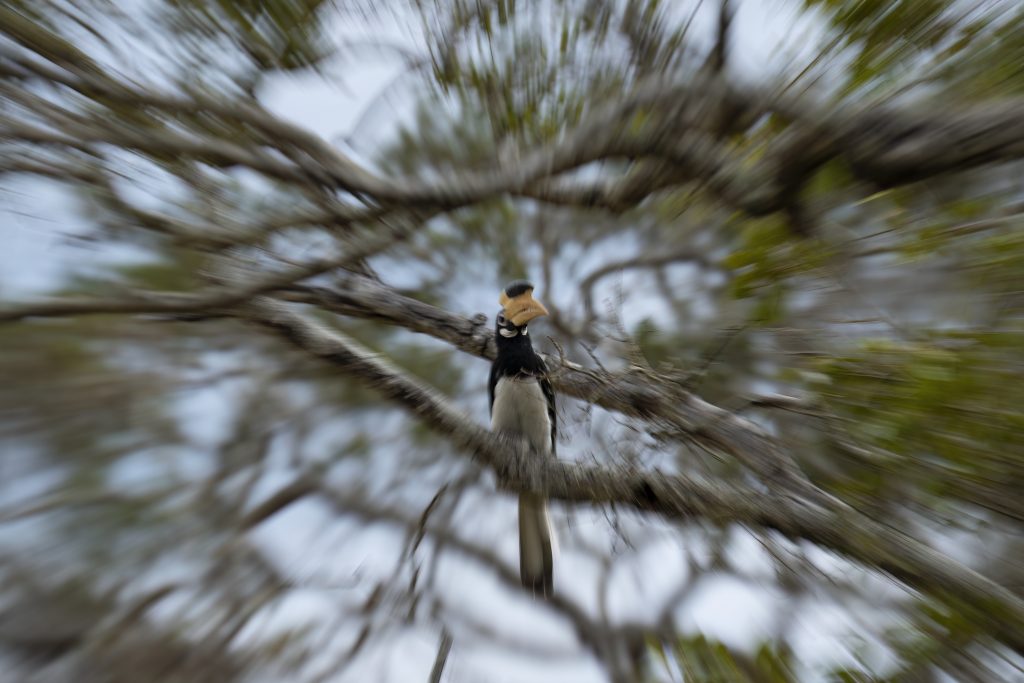
- Creative Techniques: Experiment with light and camera settings. Try slow shutter speeds
Pro Tip: Aim for a mix of close-ups, action shots, and wide environmental frames. If you are stuck then read this blog post
If you go on a photo safari – the photographer leading the trip should be encouraging you to do this all of the time.
Final Thoughts
Photographing a new wildlife destination is a blend of preparation, patience, and creativity. The more you understand the environment and its inhabitants, the more compelling your images will be. Remember: the best wildlife photos don’t just show animals – they tell stories that inspire conservation and connection.
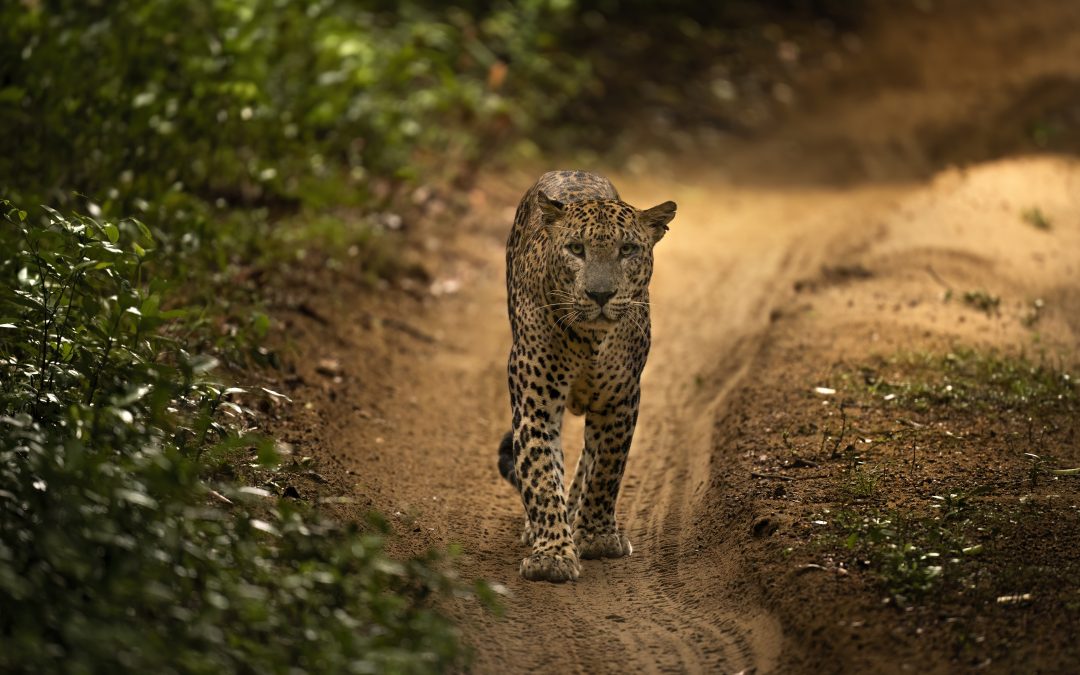
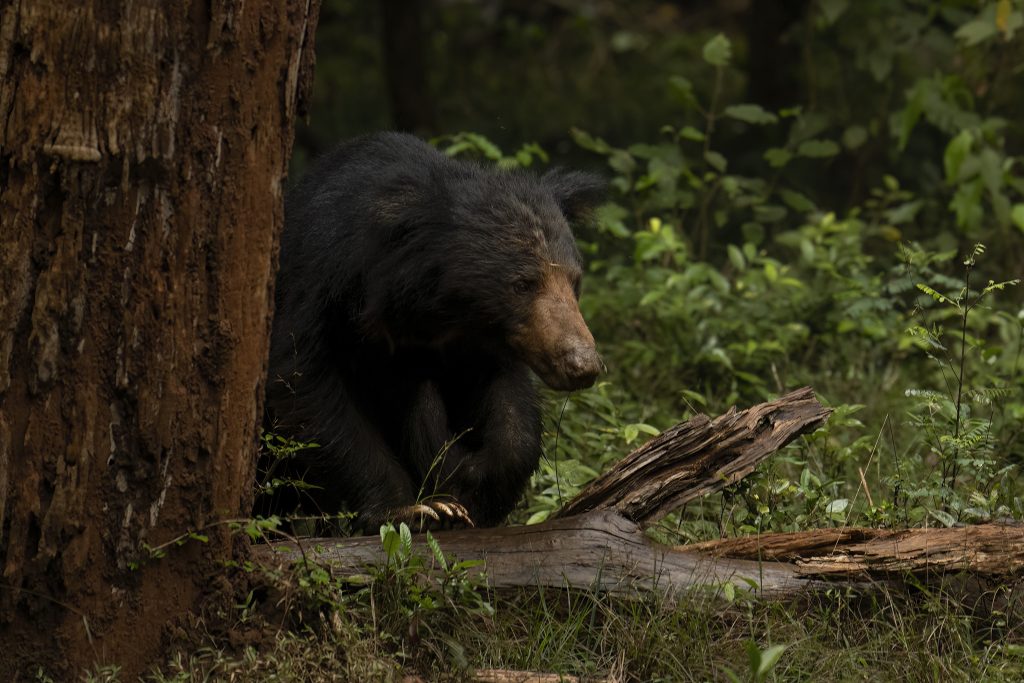
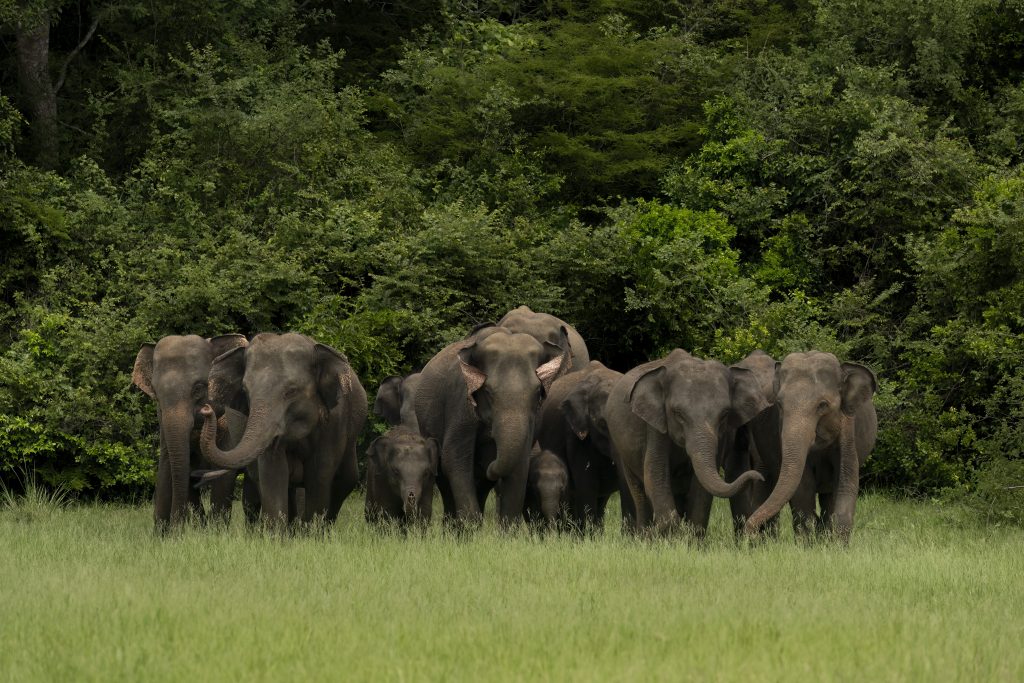
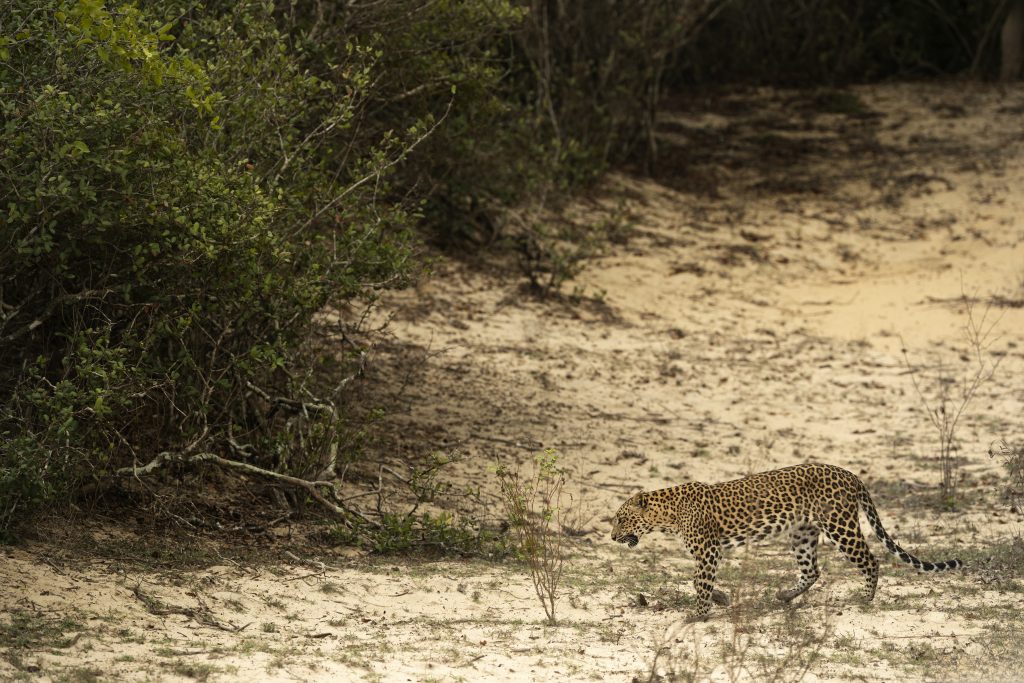
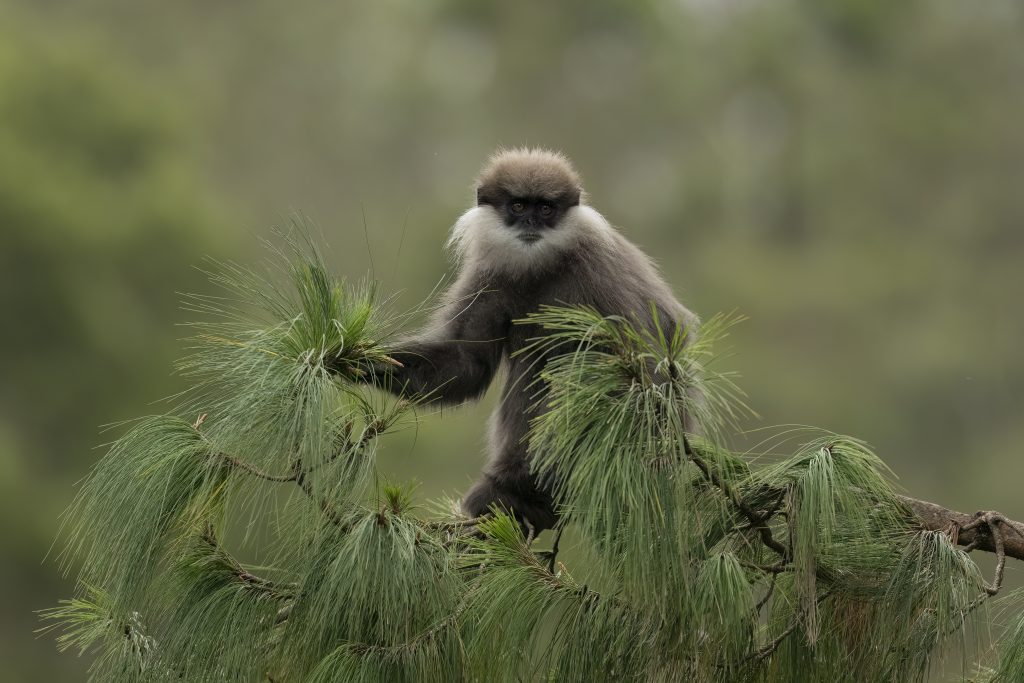
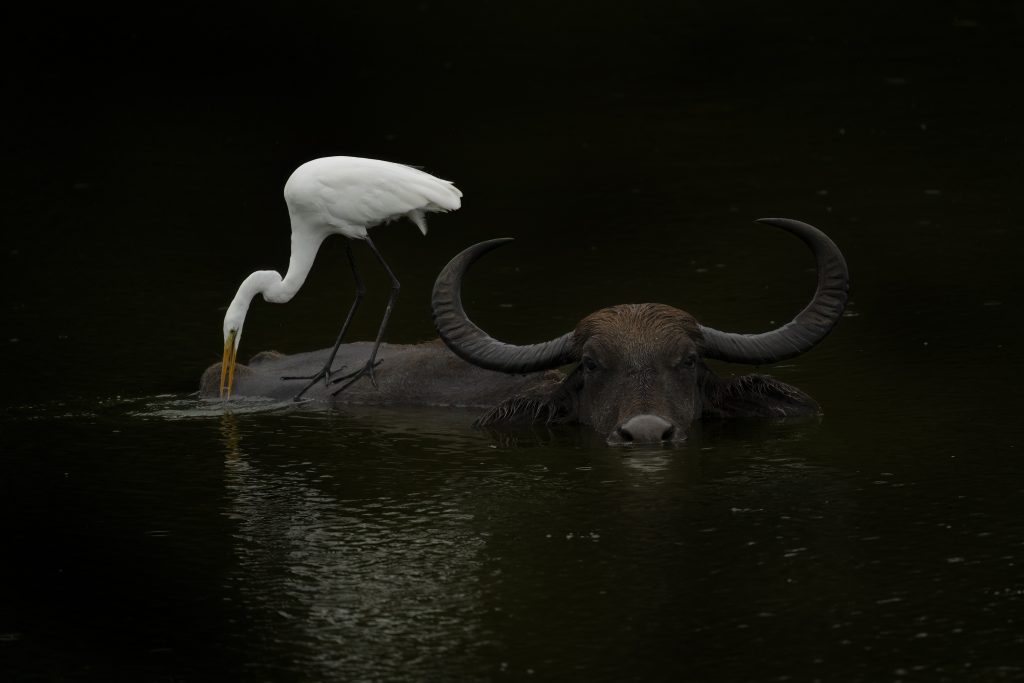
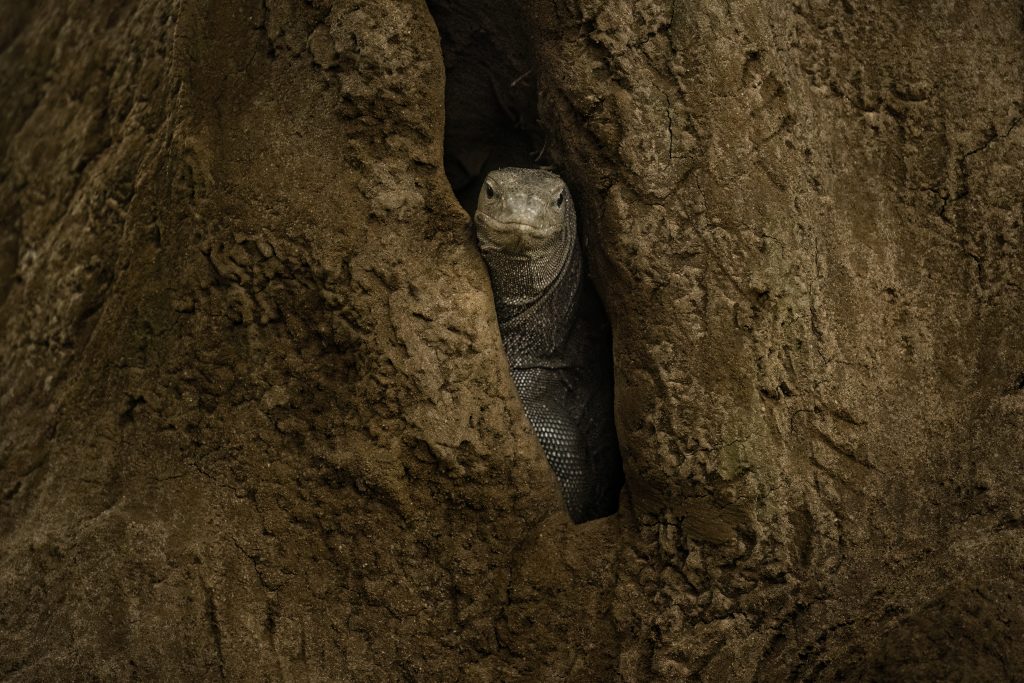
Make the most of everything that you see – photographing a new destination should not just be about the “headline species” it should also be about the “supporting cast” all of the birds and animals and landscapes that make where you are visiting a truly unique destination. All of the images in this blog are from my first time trip to Sri Lanka and I can safely say that If I was just looking to photograph leopards and sloth bear then I would have missed out on so much.
Always have this in the back of your mind. There are no guarantees that you will see what you want to see but you will always see something. There is always an image there for you if you look for it.
To see my full range of photo tours then visit my tours page
To read why a photo safari might be the best decision you ever make when choosing a destination then read here